![A look at RESTful APIs through Hapi [Part-1]](/content/images/size/w600/2018/07/0_4WLAksgjXVqLX8Fs.png)
Nowadays everyone wants a RESTful API, but if you're a newbie to the tech world, then this will make your life a little bit harder. Not long ago I was also like this ( 😀 still am). One of the most common problems newbies face when creating APIs will be understanding the documentations of the tech stacks.
Keeping that in mind let's take a much gentler approach to understand the basics of RESTful APIs by developing a simple API with the help of Hapi.js.
What is a RESTful API
I know theories can be a little bit of boring 😴 sometimes, but we have to keep in mind that developing is only one part of the equation.
With thats out of the way let's focus on the topic. We can simply define a RESTful API as bellow.
A RESTful API is an application program interface (API) that uses HTTP requests to GET, PUT, POST and DELETE data.
When I read this definition first time I was like 'Okay, now I know what REST stands for in RESTful. It's simply HTTP. But I was miles away from the truth.
So, what is REST actually?
REST is an Architectural Style
😕 Confusion, don't worry let's take a look at our new bold word.
Architectural Style

By adding constraints to software architecture , we can obtain Desired Architecture that can be used for common use cases.
Representational State Transfer or simply REST
If you ever wondered what is the long term of REST (like me 😒), now your waiting is over 😌. REST stands for Representational State Transfer. Before go into details lets take a look at the following diagram.
- User receives first state as index state.
- User progresses through the application by selecting a link (about page link)
- Resulting the next state being transferred to the user.
The transferred about page now represents the current state of the application. Simply we change the state of our application from index to about, hence the name Representational State Transfer (REST).
❓❓❓ Why are we bothering with REST
Now the most important question. Why are we making our life complicated with REST. That is because the World Wide Web is based on REST architecture.
If you build a non RESTful API for your web applications then you will be left with a sub-optimal system.
🆘 Let's save ourselves by building a RESTful API
After tiresome theory part lets begin the fun by creating our first RESTful API. We will create a basic contact book for store contact details of our friends.
First things first, the technology stack
We will be developing our RESTful API using MongoDB, Hapi, and Nodejs. Also, for this introductory application we will use Handlebars.js as our template engine.
Prerequisites
- Installed version of Node.js on your workstation.
- Code editor of your choice (mine will be VS Code).
- A web browser ( for the basic project we will not be using POSTMAN ).
- A terminal for basing out shell commands (Windows guys Git Bash is awesome for you).
Let's start coding
Before I forget you can find the complete application by visiting here.
As I told you earlier we are going to use Node.js as our javascript runtime environment. So, lets make sure that we have correctly set up the Node.js by typing the following command in your terminal.
$ node --version
You will get a output like v10.6.0, if not reinstall the Node.js.
After correctly installing Node.js on your system goto a directory of your choice to start working on our awesome Hapi Starter. Lets create a resting place for our application by using the following shell commands.
$ mkdir hapi-starter
$ cd hapi-starter
Lets create our package.json file, by typing this command (Quick Note - package.json is the resting place for all the npm dependencies that we are going to use. If you are curious and want to learn more visit this link).
$ npm init
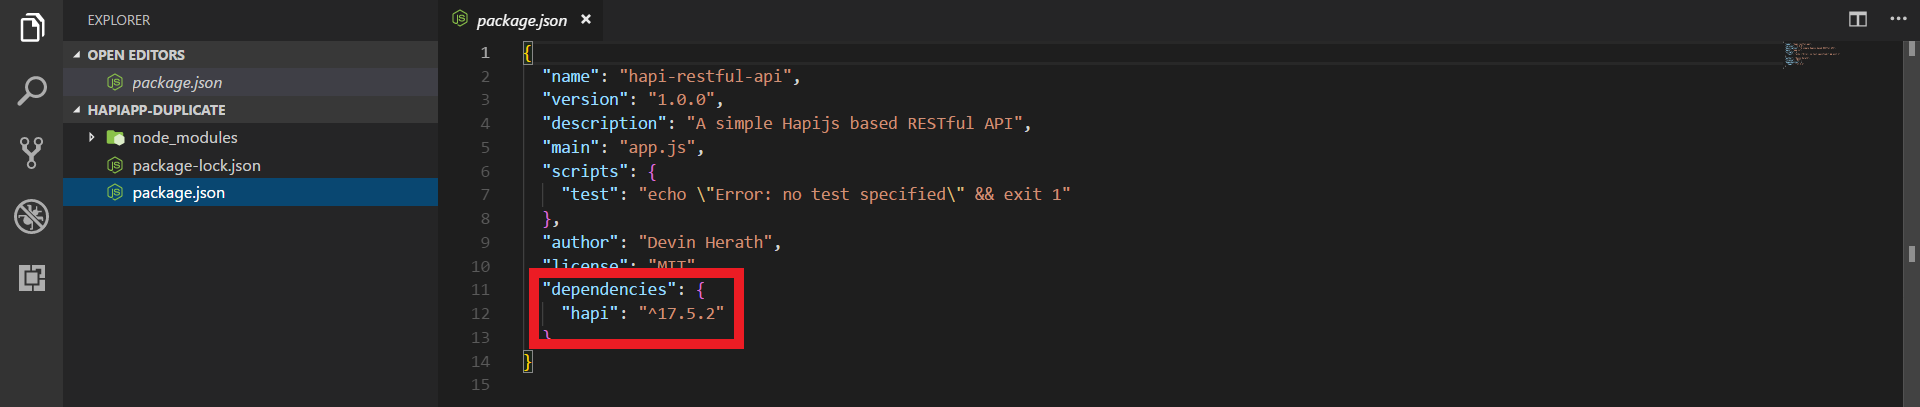
Above command will ask you a set of questions, if you're having trouble please refer the following json file I created.
{
  "name": "hapi-restful-api",
  "version": "1.0.0",
  "description": "A simple Hapijs based RESTful API",
  "main": "app.js",
  "scripts": {
    "test": "echo \"Error: no test specified\" && exit 1"
  },
  "author": "Devin Herath",
  "license": "MIT"
}
👏 Awesome, we have successfully initialize our package.json. Next thing we have to take care is installing hapi framework on our application. You can do this by simply typing the following command.
$ npm install hapi --save
If you're wondering about the above command don't be. Lets dissect it bit by bit.
- npm - npm stands for Node Package Manager. npm helps us to install thousands of modules when we are working with node.js
- install - As the word describes this specifies what are we going to do with the module. Right now we are going to install it
- hapi - The module we are going to install (There are numerous modules we can use when working with node.js)
- --save - By using this flag we can update our package.json file.
After executing the above command our folder structure should be look like below.
Lets start work on our Server
We are arriving at writing our first JS code. Without further ado lets get on it. First we need to create our main file (here app.js). This need to be in the root directory of your project. If your fond with the terminal now use the following shell command or simply create a new file using VS code with the name app.js.
$ touch app.js
Now we can create our server using the following code block.
// Import the Hapi framework
const Hapi = require('hapi');

// Store the hosting server and the port
const host = 'localhost';
const port = 8000;

// Create the Sever
const server = Hapi.Server({
  host,
  port
});

// Create a start method for the server
const start = async () => {
  try {
    await server.start();
  } catch (err) {
    console.log(err);
    process.exit(1);
  }

  console.log('Server running at:', server.info.uri);
};

// Call the start method
start();
Now its the judgment time. Lets check whether our server is running or not.
Use the following shell command to check if server is starting or not.
$ node app.js
You will see an output like below.

Lets create our first route
If you try to visit localhost:8000 on your browser you will definitely see an error like {"statusCode":404,"error":"Not Found","message":"Not Found"}. This is because we still didn't configured a route for home. Lets do this by simply adding the following code block before start() function.
// Add Home Route
server.route({
  method: 'GET',
  path: '/',
  handler: (request, h) => {
    return 'Hello World :)';
  }
});
We are creating a route for / by using GET method and returning a string containing our welcome message 'Hello World'.
Important: Before checking the new route make sure to restart the server. We can simply do this by pressing
CTRL+Cin the terminal that you are running the server. After that start the server again by typingnode app.js.
Adding Nodemon
As you can see killing the server and restarting it can get quiet tiresome over the time & if you're lazy (like lot of us 😪) this will eventually can be problematic situation.
Best way to tackle this problem is to add nodemon for our project. Nodemon is a utility that will monitor for any changes in our source and automatically restart our server.
To add nodemon goto your terminal and execute the following command.
$ npm install nodemon --save
After adding the module we can use nodemon keyword to start our server or we can add a script in our pacakge.json to give the task a little bit professional look.

After configuring the dev script we can run the server using following shell command.
$ npm run dev
Okay, lets now add a static route for about page. Before adding lets make sure to create a public folder in our root directory. Inside the public folder lets make a about.html file like below.

If you're wondering why we make a public folder, just take into account that public folder is where we keep our static files, like .css or static .html files.
Now, before we add the about route to our server we need to install a new module called inert. So, lets do that by using below shell command.
$ npm install --save inert
Then we have to register the inert. We can do this by adding the following code block inside start() function. Make sure to add it inside the code try block before await server.start().
// Register Inert
await server.register(require('inert'));
After completing this step we can finally add our about route in the app.js file.
// Static Routes
server.route({
  method: 'GET',
  path: '/about',
  handler: (request, h) => {
    return h.file('./public/about.html');
  }
});
If you visit localhost:8000/about now you will see the following output in the browser window.

Okay, exsiting stuff 😏, lets move onto little bit of advanced topics now.
Vision and Templates
Vision is a templates rendering plug-in support for hapi.js. Keep in mind that vision is not a template engine. It support multiple template engines like handlebars, ejs. In this app we will use handlebars.js as the template engine.
First, lets install the vison.
$ npm install vision --save
As, you have guessed now we have to register our vision module. Lets do that using the below code block. Add it to the start() function like above.
// Register Vision and Configure Vision Templates
await server.register(require('vision'));

server.views({
  engines: {
    html: require('handlebars')
  }
});
Here we are stating handlebars as our template engine. But to use this we have to first install the handlebars module.
$ npm install handlebars --save
Now we have to configure our template folder. We will be using views as our template folder.
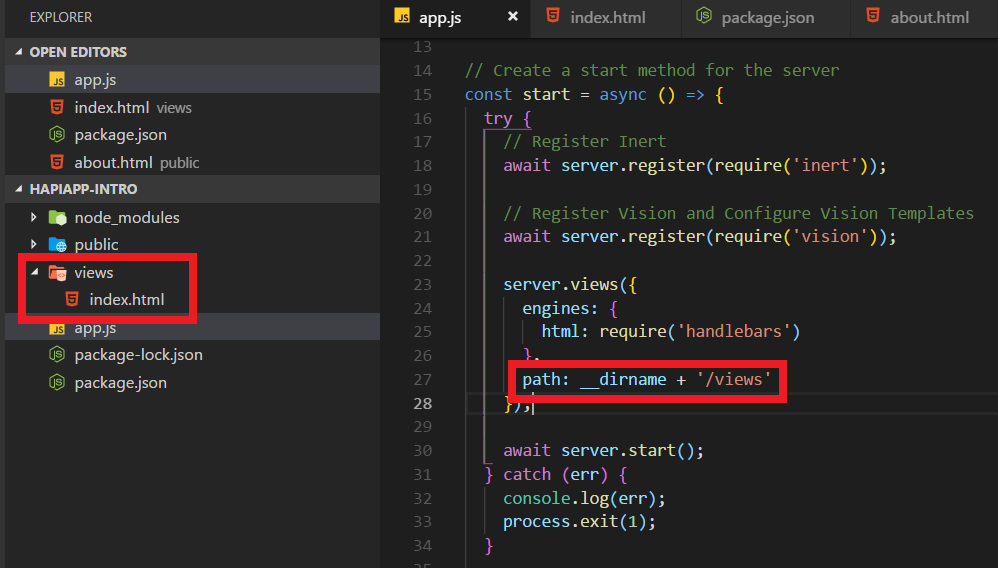
If you have any problems so far with the start() function refer to above image. After adding path to our vision configuration we need to create the views folder inside our root directory. Inside views lets create a index.html file with a simple h1 header saying 'Hello World'.
Now lets jump to our home route and chage it like below to render the index.html file.
// Add Home Route
server.route({
  method: 'GET',
  path: '/',
  handler: (request, h) => {
    return h.view('index');
  }
});
To be Continued
Now that we have set up our base project lets meet up next time in order to finish up the project by adding contacts book functionality with the help of MongoDB.
Till then have a pleasant time and do crazy things with what we have learned so far.
😀👍
